TDM 30100: Project 3 — 2023
Motivation: Documentation is one of the most critical parts of a project. There are so many tools that are specifically designed to help document a project, and each have their own set of pros and cons. Depending on the scope and scale of the project, different tools will be more or less appropriate. For documenting Python code, however, you can’t go wrong with tools like Sphinx, or pdoc.
Context: This is the second project in a 3-project series where we explore thoroughly documenting Python code, while solving data-driven problems.
Scope: Python, documentation
Dataset(s)
The following questions will use the following dataset(s):
-
/anvil/projects/tdm/data/apple/health/watch_dump.xml
Questions
|
Please use Firefox for this project. While other browsers like Chrome and Edge may work, we are providing instructions that are specific to Firefox and you may need to do a bit of research before getting another browser to work. Before you begin, open Firefox, and where you would normally put a URL, type the following, followed by enter/return. Search for |
Question 1 (1 pt)
-
Create a new directory in your
$HOMEdirectory calledproject03:$HOME/project03 -
Create a new copy of the project template in a Jupyter notebook in your project03 folder called project03.ipynb.
-
Create a module called
firstname_lastname_project03.pyin your$HOME/project03directory, with the contents of the previous project. -
Write a module-level docstring for your project03 module.
-
Write a function-level docstring for the
get_records_for_datefunction.
|
You may be concerned that this project will leave your Jupyter notebook looking empty. This is intended, as the majority of the deliverables for this project will be the documentation generated by bash code you will write soon. Additionally, we will explicity specify what the deliverables are step-by-step in each question, so you will know exactly what to submit. |
First, start by creating your new directory and copying in the template. While the deliverables say this has to have a path of $HOME/project03, you can put it anywhere you want, just note that you will have to update your code to reflect the location you choose and your final submission should not contain files unrelated to this specific project.
Next, copy the code you wrote in the previous project into a new python file in your project 3 directory called firstname_lastname_project03.py. If you didn’t finish the previous project, feel free to copy in the below code to get up-to-date. Then fill in a module-level docstring for the module along with a function-level docstring for the get_records_for_date function, both using Google style docstrings.
|
Make sure you change "firstname" and "lastname" to your first and last name. |
|
This is simply the code from the previous project that you wrote, along with all the docstrings you wrote. If you did not complete the previous project or get things working for whatever reason, feel free to use the code below. Otherwise, copy and paste your code from the previous project. |
"""
This module is for project 3 for TDM 30100.

**Serialization:** Serialization is the process of taking a set or subset of data and transforming it into a specific file format that is designed for transmission over a network, storage, or some other specific use-case.

**Deserialization:** Deserialization is the opposite process from serialization where the serialized data is reverted back into its original form.

The following are some common serialization formats:

- JSON
- Bincode
- MessagePack
- YAML
- TOML
- Pickle
- BSON
- CBOR
- Parquet
- XML
- Protobuf

**JSON:** One of the more wide-spread serialization formats, JSON has the advantages that it is human readable, and has a excellent set of optimized tools written to serialize and deserialize. In addition, it has first-rate support in browsers. A disadvantage is that it is not a fantastic format storage-wise (it takes up lots of space), and parsing large JSON files can use a lot of memory.

**MessagePack:** MessagePack is a non-human-readable file format (binary) that is extremely fast to serialize and deserialize, and is extremely efficient space-wise. It has excellent tooling in many different languages. It is still not the *most* space efficient, or *fastest* to serialize/deserialize, and remains impossible to work with in its serialized form.

Generally, each format is either *human-readable* or *not*. Human readable formats are able to be read by a human when opened up in a text editor, for example. Non human-readable formats are typically in some binary format and will look like random nonsense when opened in a text editor.

"""
import lxml
import lxml.etree
from datetime import datetime, date


def get_records_for_date(tree: lxml.etree._ElementTree, for_date: date) -> list:
    """
    insert function-level docstring here
    """

    if not isinstance(tree, lxml.etree._ElementTree):
        raise TypeError('tree must be an lxml.etree')

    if not isinstance(for_date, date):
        raise TypeError('for_date must be a datetime.date')

    results = []
    for record in tree.xpath('/HealthData/Record'):
        if for_date == datetime.strptime(record.attrib.get('startDate'), '%Y-%m-%d %X %z').date():
            results.append(record)

    return results
Next, in a bash cell in your project03.ipynb notebook, run the following, replacing "Firstname Lastname" with your name. This code will initialize a new Sphinx project inside your project03 directory, and we will explore the actual contents and purpose of the files generated throughout this project. Before moving on though, be sure to read through this page of the official Sphinx documentation to understand exactly what all of the arguments in this command do.
%%bash

cd $HOME/project03
python3 -m sphinx.cmd.quickstart ./docs -q -p project03 -a "Firstname Lastname" -v 1.0.0 --sep|
What do all of these arguments do? Check out this page of the official documentation. |
You should be left with a newly created docs directory within your project03 directory: $HOME/project03/docs. The directory structure should look similar to the following.
project03(1)
├── 39000_f2021_project03_solutions.ipynb(2)
├── docs(3)
│   ├── build (4)
│   ├── make.bat
│   ├── Makefile (5)
│   └── source (6)
│       ├── conf.py (7)
│       ├── index.rst (8)
│       ├── _static
│       └── _templates
└── kevin_amstutz_project03.py(9)

5 directories, 6 files
| 1 | Our module (named project03) folder |
| 2 | Your project notebook (probably named something like firstname_lastname_project03.ipynb) |
| 3 | Your documentation folder |
| 4 | Your empty build folder where generated documentation will be stored (inside docs) |
| 5 | The Makefile used to run the commands that generate your documentation (inside docs) |
| 6 | Your source folder. This folder contains all hand-typed documentation (inside docs) |
| 7 | Your conf.py file. This file contains the configuration for your documentation. (inside source) |
| 8 | Your index.rst file. This file (and all files ending in .rst) is written in reStructuredText — a Markdown-like syntax. (inside source) |
| 9 | Your module. This is the module containing the code from the previous project, with nice, clean docstrings. (also given above) |
Please make the following modifications:
-
To Makefile:
# replace SPHINXOPTS ?= SPHINXBUILD ?= sphinx-build SOURCEDIR = source BUILDDIR = build # with the following SPHINXOPTS ?= SPHINXBUILD ?= python3 -m sphinx.cmd.build SOURCEDIR = source BUILDDIR = build -
To conf.py:
# CHANGE THE FOLLOWING CONTENT FROM:

# -- Path setup --------------------------------------------------------------

# If extensions (or modules to document with autodoc) are in another directory,
# add these directories to sys.path here. If the directory is relative to the
# documentation root, use os.path.abspath to make it absolute, like shown here.
#
# import os
# import sys
# sys.path.insert(0, os.path.abspath('.')

# TO:

# -- Path setup --------------------------------------------------------------

# If extensions (or modules to document with autodoc) are in another directory,
# add these directories to sys.path here. If the directory is relative to the
# documentation root, use os.path.abspath to make it absolute, like shown here.
#
import os
import sys
sys.path.insert(0, os.path.abspath('../..'))
Finally, with the modifications above having been made, run the following command in a bash cell in Jupyter notebook to generate your documentation.
cd $HOME/project03/docs
make html
After complete, your module folders structure should look something like the following.
project03
├── 39000_f2021_project03_solutions.ipynb
├── docs
│   ├── build
│   │   ├── doctrees
│   │   │   ├── environment.pickle
│   │   │   └── index.doctree
│   │   └── html
│   │       ├── genindex.html
│   │       ├── index.html
│   │       ├── objects.inv
│   │       ├── search.html
│   │       ├── searchindex.js
│   │       ├── _sources
│   │       │   └── index.rst.txt
│   │       └── _static
│   │           ├── alabaster.css
│   │           ├── basic.css
│   │           ├── custom.css
│   │           ├── doctools.js
│   │           ├── documentation_options.js
│   │           ├── file.png
│   │           ├── jquery-3.5.1.js
│   │           ├── jquery.js
│   │           ├── language_data.js
│   │           ├── minus.png
│   │           ├── plus.png
│   │           ├── pygments.css
│   │           ├── searchtools.js
│   │           ├── underscore-1.13.1.js
│   │           └── underscore.js
│   ├── make.bat
│   ├── Makefile
│   └── source
│       ├── conf.py
│       ├── index.rst
│       ├── _static
│       └── _templates
└── kevin_amstutz_project03.py

9 directories, 29 files
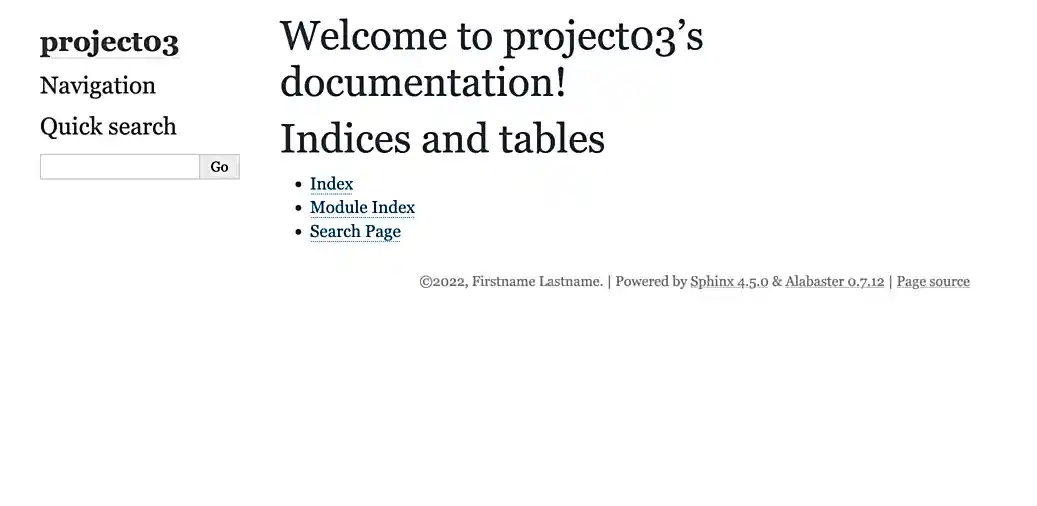
Finally, let’s take a look at the results! In the left-hand pane in the Jupyter Lab interface, navigate to yourpath/project03/docs/build/html/, and right click on the index.html file and choose Open in New Browser Tab. You should now be able to see your documentation in a new tab. It should look something like the following.

|
Make sure you are able to generate the documentation before you proceed, otherwise, you will not be able to continue to modify, regenerate, and view your documentation. |
-
Directory for project 3, containing an ipynb file and a python file as described above.
-
Module and function level docstrings where appropriate in the python file.
-
Documentation generated by Sphinx, as instructed above.
Question 2 (2 pts)
-
Write a function called
get_avg_heart_rateto get the average heart rate for a given date from our watch data. -
Write a function called
get_median_heart_rateto find median heart rate for a given date from our watch data. -
Write a function called
graph_heart_rateto create a box-and-whisker plot of heart rate for a given date from our watch data. -
Give each function an appropriate docstring.
-
Run each function for April 4th, 2019 in your Jupyter notebook to prove they work. Ensure you add them to project03-key.py.
-
Regenerate your documentation, and view the results in a new tab.
|
While you could redefine all of your logic to get data for a given date, it would be much easier to simply reuse the function you wrote in the previous project within your new functions. |
|
Feel free to use library functions for the above functions (i.e. statistics for mean and median and matplotlib for plotting) |
You can test your code using the following code in your Jupyter notebook:
date_records = get_records_for_date(tree, for_date)
print(f"Average: {format(get_avg_heart_rate(date_records),'.2f')}")
print(f"Median : {format(get_median_heart_rate(date_records),'.2f')}")
graph_heart_rate(date_records)

# This should output values in a format similar to the following:
# Average: 86.25
# Median : 83.00
# The box and whisker plot should reflect what you see in the average/median measures. Feel free to write an extra function to get standard deviations or quartiles for a more accurate way to check your work is correct.-
3 functions, named and as described above, including function-level docstrings.
-
Outputs of running the functions on April 4th, 2019.
-
Documentation generated by Sphinx, as instructed above.
Question 3 (2 pts)
-
Create your own README.rst file in the
docs/sourcefolder. -
regenerate your documentation, and take a picture of the resulting webpage.
One of the most important documents in any package or project is the README file. This file is so important that version control companies like GitHub and GitLab will automatically display it below the repositories contents. This file contains things like instructions on how to install the packages, usage examples, lists of dependencies, license links, etc. Check out some popular GitHub repositories for projects like numpy, pytorch, or any other repository you’ve come across that you believe does a good job explaining the project.
In the docs/source folder, create a new file called README.rst. Choose 5 of the following "types" of reStructuredText from the this webpage, and create a fake README. The content can be Lorem Ipsum type of content as long as it demonstrates 5 of the types of reStructuredText.
-
Inline markup
-
Lists and quote-like blocks
-
Literal blocks
-
Doctest blocks
-
Tables
-
Hyperlinks
-
Sections
-
Field lists
-
Roles
-
Images
-
Footnotes
-
Citations
-
Etc.
|
Make sure to include at least 1 section. This counts as 1 of your 5 types of reStructuredText. |
Once complete, add a reference to your README to the index.rst file. To add a reference to your README.rst file, open the index.rst file in an editor and add "README" as follows.
.. project3 documentation master file, created by
   sphinx-quickstart on Wed Sep  1 09:38:12 2021.
   You can adapt this file completely to your liking, but it should at least
   contain the root `toctree` directive.

Welcome to project3's documentation!
====================================

.. toctree::
   :maxdepth: 2
   :caption: Contents:

   README

Indices and tables
==================

* :ref:`genindex`
* :ref:`modindex`
* :ref:`search`|
Make sure "README" is aligned with ":caption:" — it should be 3 spaces from the left before the "R" in "README". |
In a new bash cell in your notebook, regenerate your documentation.
%%bash

cd $HOME/project03/docs
make html
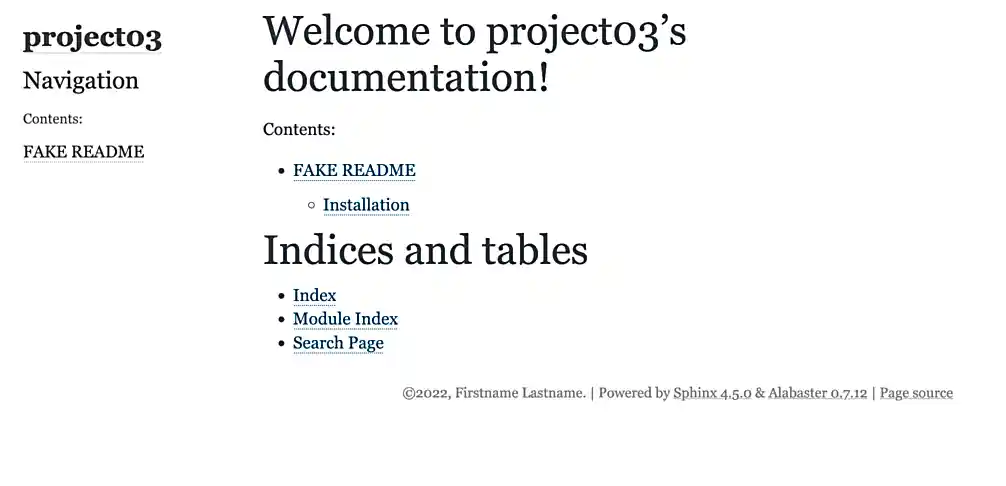
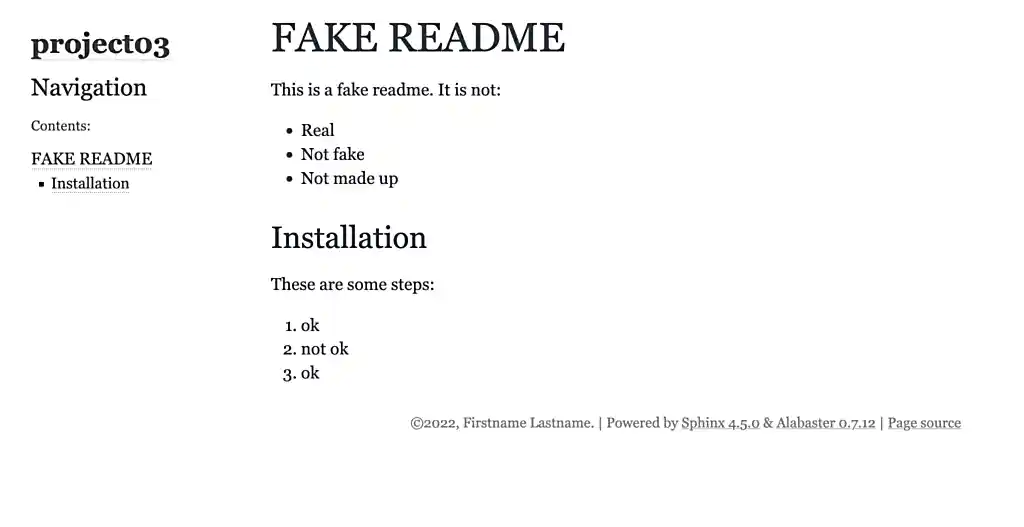
Check out the resulting index.html page, and click on the links. Pretty great!
|
Things should look similar to the following images. 
Figure 2. Sphinx output

Figure 3. Sphinx output
|
-
Screenshot labeled "question03_results". Make sure you include your screenshot correctly.
-
OR a PDF created by exporting the webpage.
For this project, please submit the following files:
-
The
.ipynbfile with: -
all functions throughout the project, demonstrated to be working as excpected.
-
every different bash command used to call Sphinx at least once
-
screenshots whenever we asked for them in a question
-
An
.htmlfile with your newest set of documention.
|
Please make sure to double check that your submission is complete, and contains all of your code and output before submitting. If you are on a spotty internet connection, it is recommended to download your submission after submitting it to make sure what you think you submitted, was what you actually submitted. In addition, please review our submission guidelines before submitting your project. |